When it comes to drawing a turtle’s shell, many artists struggle to get it just right. The shell is a crucial part of a turtle’s anatomy, and getting it accurate is essential to creating a believable and realistic depiction of these fascinating creatures. In this article, we’ll explore the steps involved in drawing a turtle’s shell, from the basic shape to the intricate details that make it unique.
Why Drawing a Turtle’s Shell is Important
When drawing a turtle, the shell is often the most prominent feature. It’s what sets them apart from other reptiles and makes them instantly recognizable. Drawing a turtle’s shell accurately requires a good understanding of its shape, size, and texture. This is important not only for creating a realistic representation of the animal but also for conveying its unique characteristics and personality.
What You’ll Learn in This Article
In this article, we’ll cover the following topics:
- How to draw the basic shape of a turtle’s shell
- How to add texture and detail to the shell
- How to create a realistic shell pattern
- How to incorporate the shell into a larger drawing or illustration
Whether you’re an artist, illustrator, or simply a turtle enthusiast, this article will provide you with the skills and knowledge you need to draw a turtle’s shell with confidence and accuracy.
How to Draw a Turtle’s Shell
Turtles are fascinating creatures, and their shells are an integral part of their anatomy. Drawing a turtle’s shell can be a fun and creative activity, and with the right techniques and guidance, you can create a realistic and detailed shell. In this article, we will explore the steps to draw a turtle’s shell, from the basics to the advanced techniques.
Understanding the Turtle’s Shell
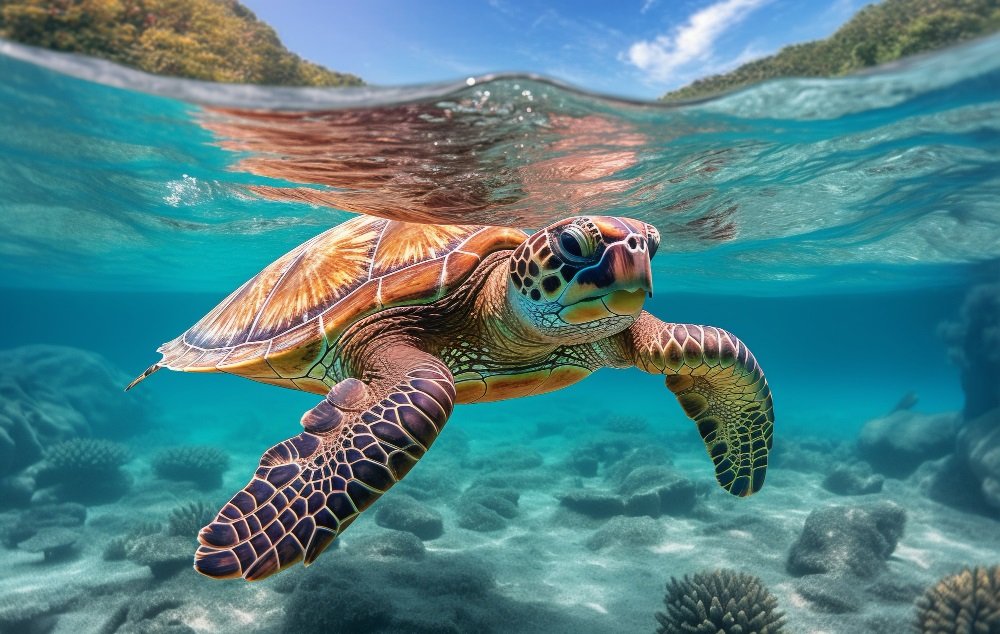
The turtle’s shell is a unique and complex structure that provides protection and support for the turtle’s body. It is made up of two main parts: the carapace and the plastron. The carapace is the dorsal (top) part of the shell, while the plastron is the ventral (bottom) part. The shell is made up of bony plates called scutes, which are covered in a tough, leathery skin.
There are several types of turtles, and each has its own unique shell pattern and shape. Some turtles have a dome-shaped shell, while others have a more flat or rounded shell. Some turtles also have a distinctive pattern of ridges or bumps on their shell, while others have a smooth, glossy surface.
Materials Needed
To draw a turtle’s shell, you will need a few basic materials. These include: (See Also: Where To See Turtles In Poipu)
- Paper: You can use any type of paper you like, but it’s best to use a paper with a smooth surface.
- Pencils: You will need a range of pencils, from a sharp #2 pencil to a softer, darker pencil.
- Erasers: You will need an eraser to correct any mistakes and to create highlights on your shell.
- Markers or colored pencils: If you want to add color to your shell, you can use markers or colored pencils.
Step 1: Sketch the Basic Shape
To draw a turtle’s shell, start by sketching the basic shape of the shell. Use a sharp #2 pencil to draw a rough outline of the shell, including the carapace and the plastron. Make sure to include the distinctive shape of the turtle’s head and neck.
Pay attention to the proportions of the shell. The carapace should be slightly wider than the plastron, and the shell should be roughly oval in shape. The head and neck should be positioned at the front of the shell, and the tail should be at the back.
Step 2: Add the Scutes
Once you have the basic shape of the shell, you can start adding the scutes. Scutes are the bony plates that make up the shell, and they are typically arranged in a specific pattern. There are several types of scutes, including:
- Scutes on the carapace: These scutes are typically arranged in a row, with each scute overlapping the one below it.
- Scutes on the plastron: These scutes are typically arranged in a pattern of rows and columns.
- Scutes on the bridge: The bridge is the area where the carapace and plastron meet. This area is typically covered in scutes that are arranged in a specific pattern.
To draw the scutes, use a softer pencil to draw a series of connected rectangles or squares. Make sure to vary the size and shape of the scutes to create a natural-looking pattern.
Step 3: Add the Ridges and Bumps
Many turtles have ridges or bumps on their shell, which can add texture and interest to your drawing. To draw these ridges and bumps, use a sharp pencil to draw a series of lines or curves on the surface of the shell. You can also use a marker or colored pencil to add color and shading to the ridges and bumps.
Pay attention to the pattern of the ridges and bumps. Some turtles have a distinctive pattern of ridges or bumps, while others have a more random pattern. You can also experiment with different shapes and sizes of ridges and bumps to create a unique look.
Step 4: Add the Highlights and Shading
To add highlights and shading to your shell, use a range of pencils or markers. Start by adding highlights to the scutes and ridges, using a sharp pencil or a light-colored marker. Then, use a softer pencil or a darker marker to add shading to the scutes and ridges. (See Also: Does Barnacles Hurt Turtles)
Pay attention to the direction of the highlights and shading. Highlights should be added to the areas where the light would naturally hit the shell, while shading should be added to the areas where the light would be blocked or reflected.
Step 5: Add the Final Details
The final step in drawing a turtle’s shell is to add the final details. This can include:
- The eyes: Use a sharp pencil or a marker to draw the eyes, making sure to include the distinctive shape and color of the turtle’s eyes.
- The nostrils: Use a sharp pencil or a marker to draw the nostrils, making sure to include the distinctive shape and size of the turtle’s nostrils.
- The mouth: Use a sharp pencil or a marker to draw the mouth, making sure to include the distinctive shape and size of the turtle’s mouth.
- The legs and tail: Use a sharp pencil or a marker to draw the legs and tail, making sure to include the distinctive shape and size of the turtle’s legs and tail.
Pay attention to the proportions and details of the turtle’s body. Make sure to include the distinctive shape and size of the turtle’s head, neck, and body.
Recap
Drawing a turtle’s shell can be a fun and creative activity, and with the right techniques and guidance, you can create a realistic and detailed shell. By following the steps outlined in this article, you can learn how to draw a turtle’s shell, from the basics to the advanced techniques. Remember to pay attention to the proportions and details of the shell, and to experiment with different shapes and sizes of scutes and ridges to create a unique look.
Conclusion
In conclusion, drawing a turtle’s shell is a fun and creative activity that requires attention to detail and a willingness to experiment with different techniques. By following the steps outlined in this article, you can learn how to draw a turtle’s shell, from the basics to the advanced techniques. Remember to pay attention to the proportions and details of the shell, and to experiment with different shapes and sizes of scutes and ridges to create a unique look. With practice and patience, you can create a realistic and detailed shell that is sure to impress.
Here are five FAQs related to “How To Draw A Turtle’s Shell”:
Frequently Asked Questions
What is the best way to start drawing a turtle’s shell?
The best way to start drawing a turtle’s shell is to begin with a large oval shape. This will serve as the base of the shell. Make sure the oval is tall and not too wide, as turtles have a more elongated shell shape. (See Also: Can Turtles Eat Cheerios)
How do I add the ridges and scutes to the shell?
To add the ridges and scutes to the shell, start by drawing a series of curved lines that follow the shape of the oval. These lines should be spaced evenly apart and should get progressively smaller as they move towards the top of the shell. The scutes are the individual plates that make up the shell, so be sure to add some texture and detail to each one to give it a more realistic look.
Can I use different shapes and sizes for the scutes?
Yes, you can use different shapes and sizes for the scutes to add some variation and interest to your drawing. Some turtles have scutes that are more rounded, while others have more pointed or angular shapes. You can also vary the size of the scutes to create a more dynamic and interesting shell shape.
How do I add the turtle’s head and legs to the shell?
To add the turtle’s head and legs to the shell, start by drawing a small circle for the head and two small lines for the legs. The head should be positioned at the top of the shell, and the legs should be drawn extending from the bottom of the shell. Make sure the legs are in proportion to the shell and the head, and add some detail to the head such as eyes and a mouth.
What are some tips for drawing a realistic turtle shell?
Some tips for drawing a realistic turtle shell include paying attention to the shape and texture of the shell, adding some shading and shadowing to give it depth and dimension, and being mindful of the proportions of the shell to the rest of the turtle’s body. You can also study pictures of real turtles and their shells to get a better sense of the shape and texture you’re trying to achieve in your drawing.